Hiking Exercises for the Outdoor Adventurer
December 29, 2016Hiking is one of my favorite things to do.
But before I became a PT, my hiking skills were not the best.
I didn’t know how to condition myself so I could avoid pain and soreness both during and after the hike. Now with the knowledge I have of the musculoskeletal system and knowing the demands of the hikes I want to go on, I can focus on the beauty of the scenery without being distracted by the burning in my legs.
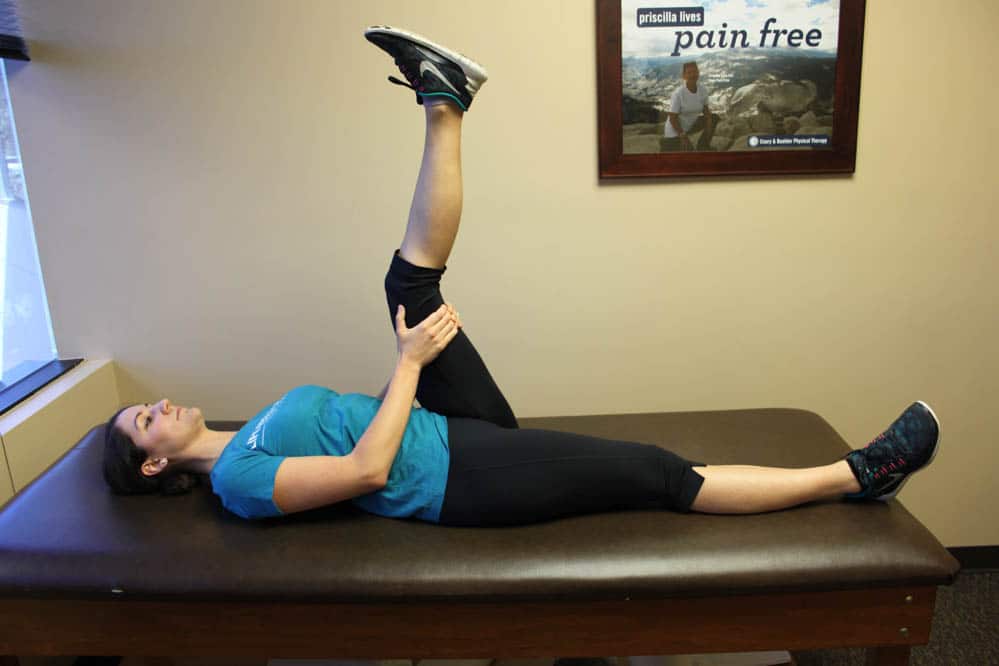
1. Hamstring Stretch (Laying Down)
Having flexible hamstrings is especially important for getting yourself up tall steps or reaching long distances with your legs as when jumping over a creek.
- Lay on your back
- Hold behind your thigh to bring your knee toward your chest
- Straighten your knee until you feel a stretch in the back of your thigh
- If you feel a stretch in your calf, you’ve gone too far!
(2 Sets, Hold Each Leg for 1 Min)
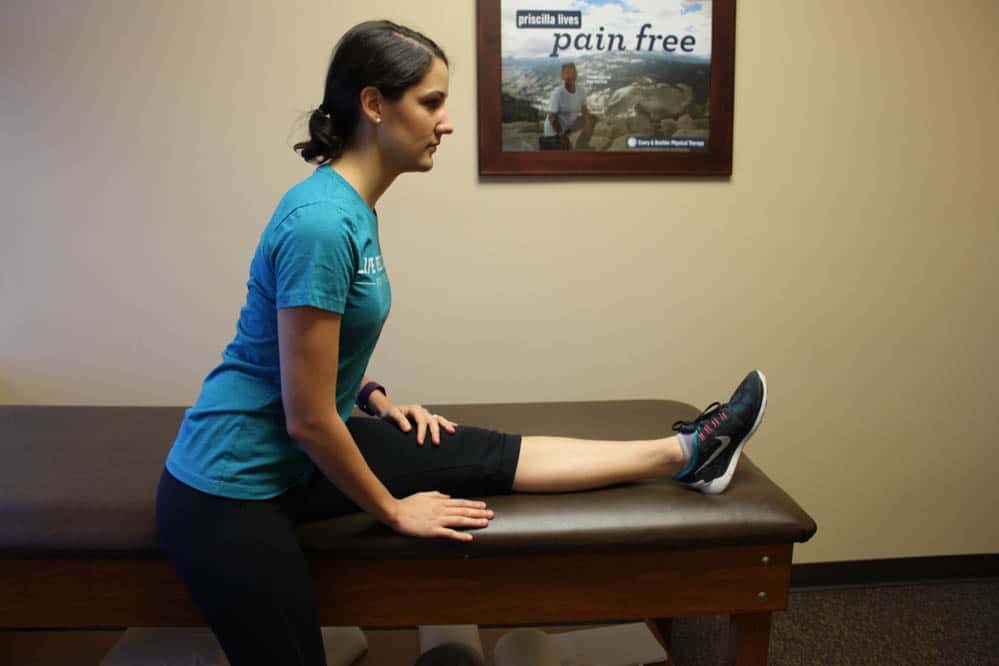
2. Hamstring Stretch (On an Edge)
- Lay your leg at the edge of the bed or table
- Hinge forward at your hip joint without rounding your spine
- Try to keep your knee straight
- If you feel a stretch in your calf, you’ve gone too far!
(2 Sets, Hold Each Leg for 1 Min)
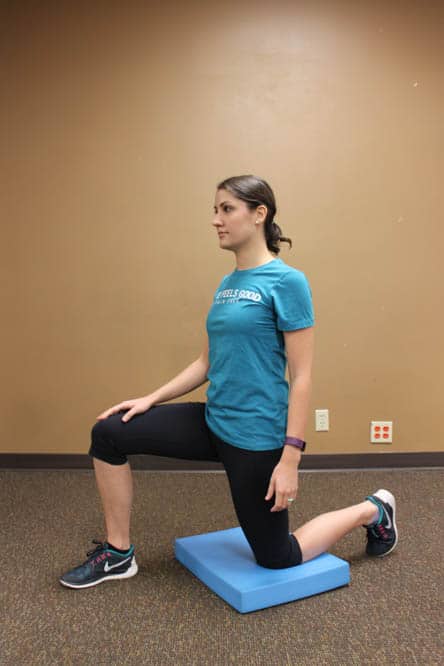
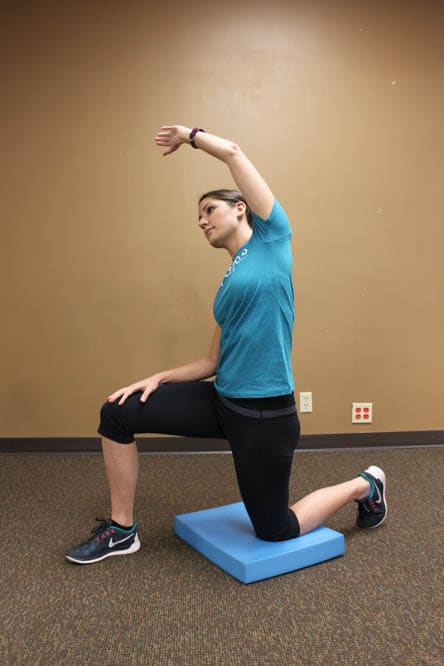
3. Kneeling Hip Flexor
As with any repetitive movement that propels us forward, our hip flexors have the tendency to be over-used and can get very tight, which can lead to low back pain if not addressed.
Keep your hip flexors from getting tight by stretching them before and after your hike.
- From a lunge position, rest your knee on a cushioned surface (pillow, plush carpet)
- Engage your core so as not to arch your low back
- Lean your body weight forward until you feel a stretch in the front of your thigh
- Add the same-side arm up and over your head to intensify the stretch
(2 Sets, Hold Each Leg for 1 Min)
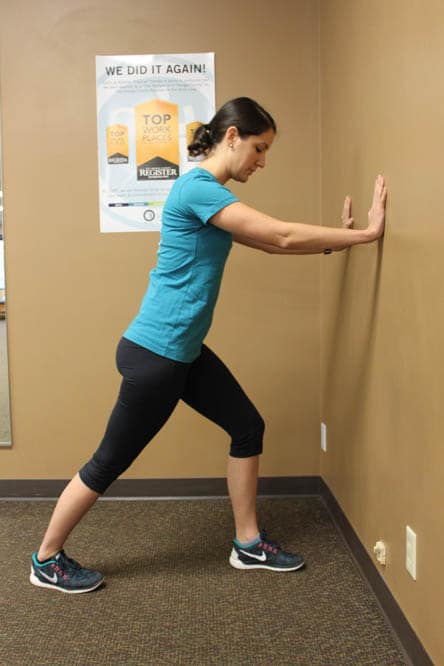
4. Calf Stretch (Knees Straight)
Especially when walking up hills, we need to be able to bend at our ankle enough to avoid excess stress to our Achilles tendon and knees.
- Face and place your hands on the wall; stagger your stance into a lunge
- Keep the back knee straight
- Hinge forward at the ankle without letting the heel rise from the floor
(2 Sets, Hold Each Leg for 1 Min)
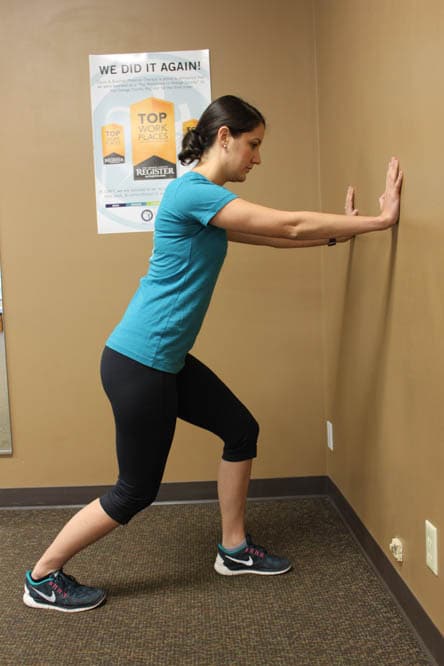
5. Calf Stretch (Knees Bent)
This variation of the same stretch targets the soleus muscle, one of our calf muscle that largely contributes to the Achilles tendon and is often the culprit of Achilles tendonitis when it occurs.
- From the position you achieved for the calf stretch with the knees straight, simply bend the back knee
- Keep your heel on the ground
(2 Sets, Hold Each Leg for 1 Min)
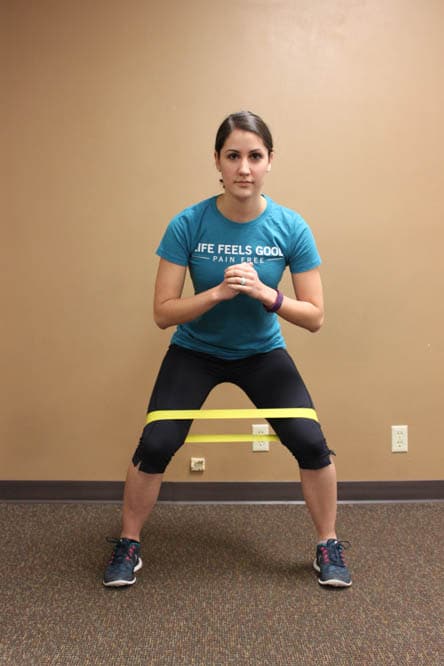
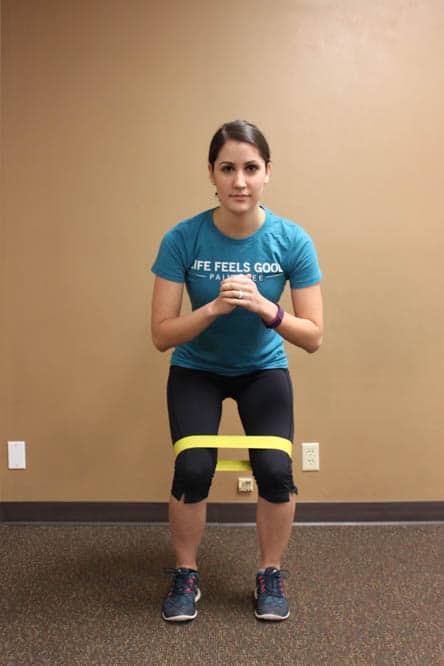
6. Crab Walks
There are a lot of gluteal muscles that are important in stabilizing our pelvis and low back when we traverse uneven terrain. This exercise targets the hip abductors, of which the gluteus medius is especially important to avoid overusing the piriformis muscle which has the potential to compress the sciatic nerve and cause sciatica.
Make sure to keep your toes pointing forward!
- Wrap a resistance band around your knees (or ankles for increased difficulty)
- Assume a squat position with your knees over your feet, not in front of your toes
- Step the leg out to the side against the resistance
- Keep the toes pointing forward!
- Avoid arching the low back, engage your core
- Maintain the depth of your squat
- Step the other leg back under your hip
(3 sets of 10 steps in each direction)
7. Heel Raises (Knees Straight)
This exercise targets a large calf muscle that functions to propel your body weight up inclines. Try to perform this exercise over the edge of a step if available.
- Place the ball of your foot at the edge of a step, stair, or curb
- Keeping the knee straight, raise the heel as high as you can
- Slowly lower all the way down so your heel is lower than the step
- Perform on both feet at the same time at first if unable to perform this with the knee straight on one leg.
(3 Sets of 12 on each leg)
8. Heel Raises (Knees Bent)
Just as it is important to stretch the soleus muscle to avoid Achilles tendonitis, it is equally as important that it be strong enough to help raise your body uphill against gravity.
- Same as above, but maintain a 30-degree bend in your knee
(3 Sets of 12 on each leg)
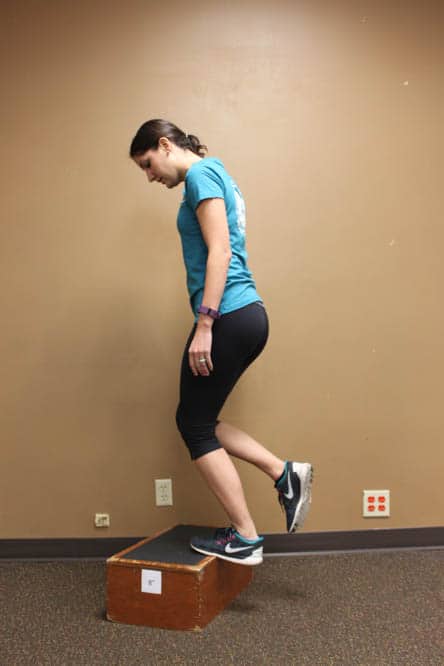
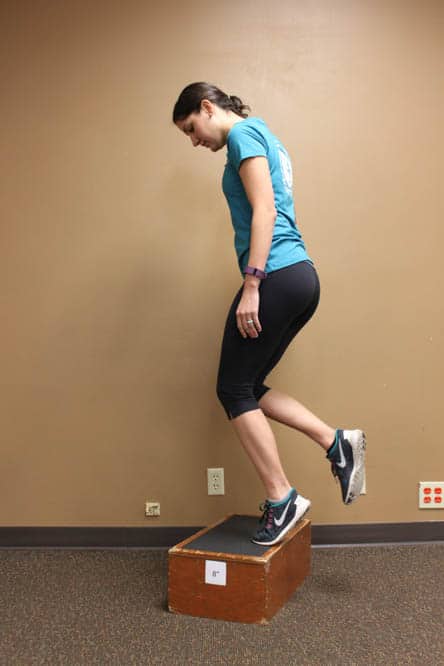
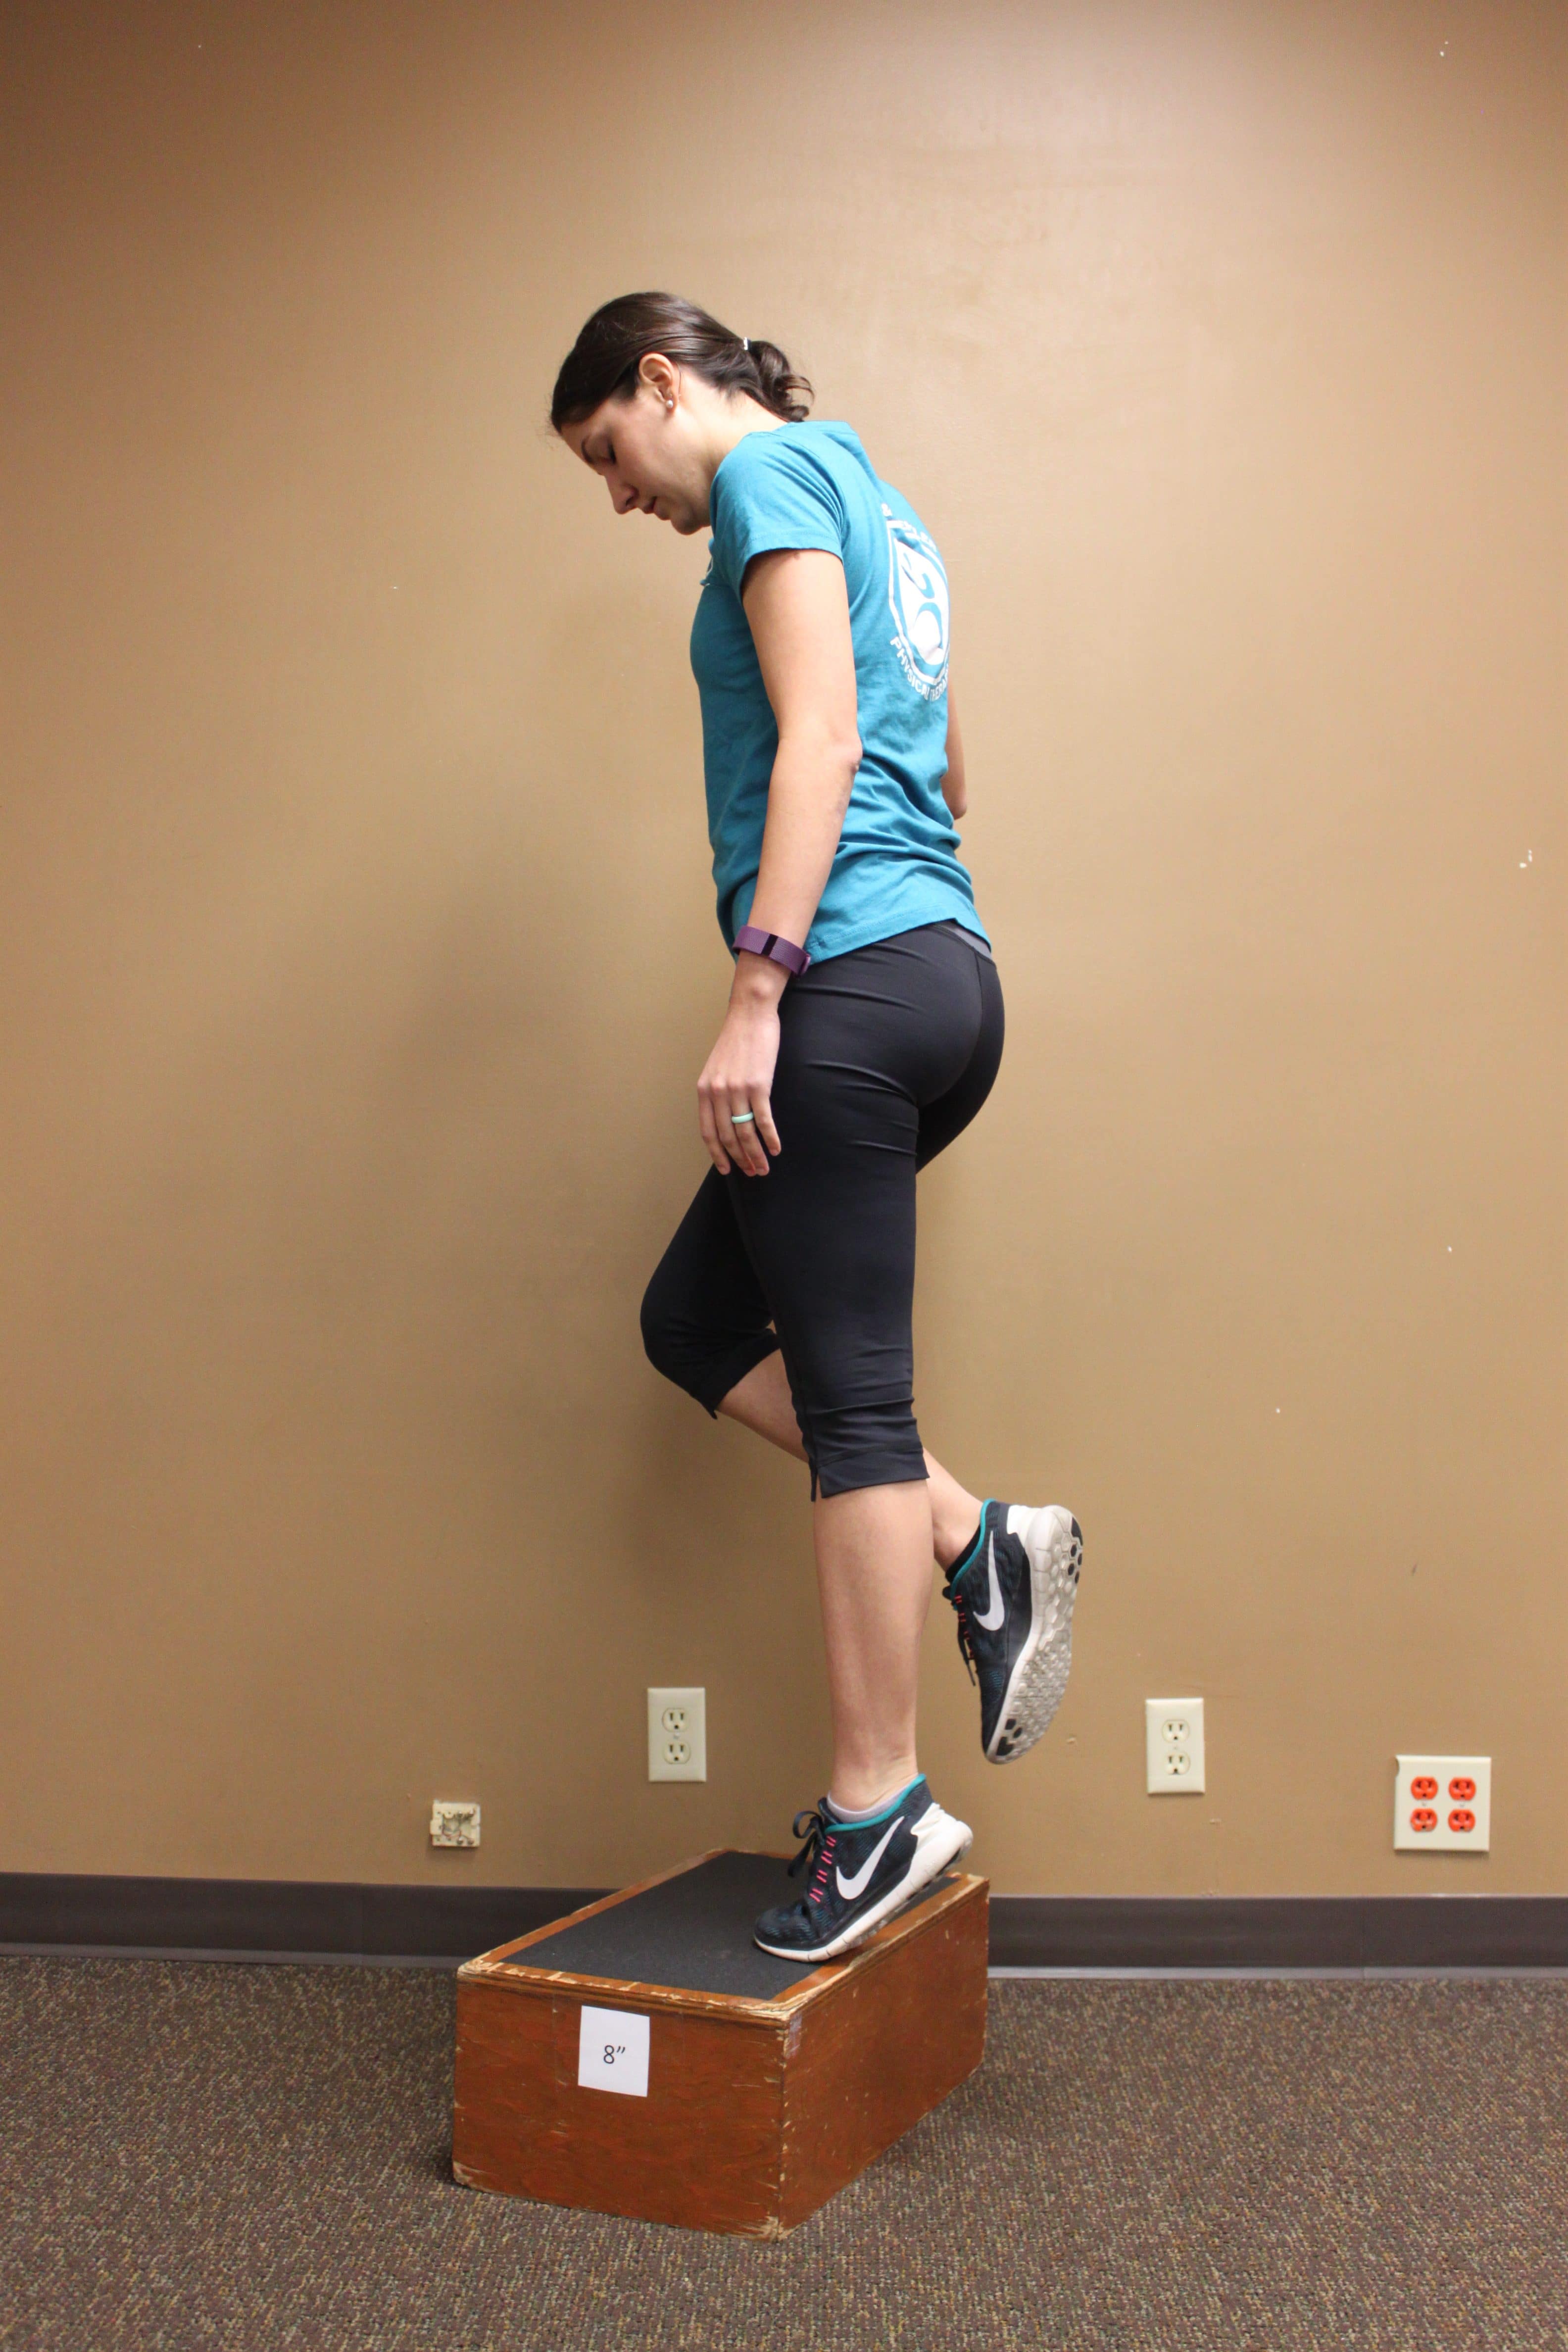
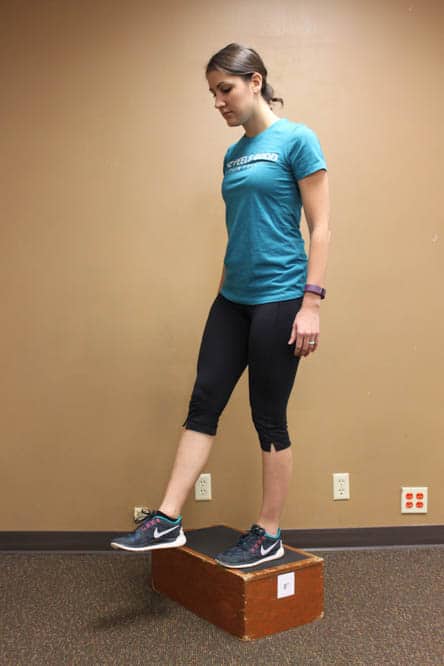
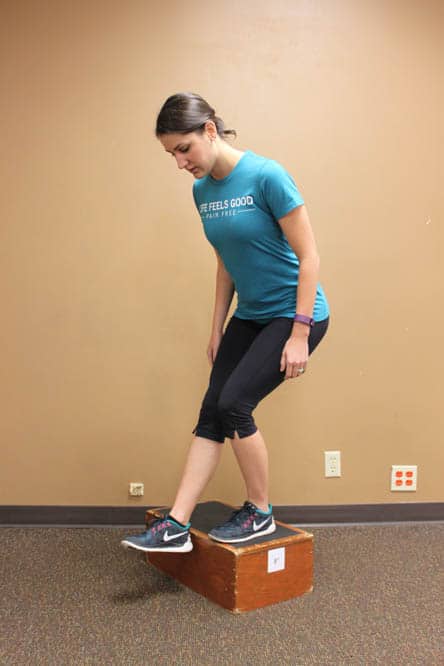
9. Step Downs
If you have knee pain on the way down from your hike, this exercise is what you need! This will help strengthen both the glutes and the quads as they eccentrically contract to slowly lower you down steps and inclines.
It’s also a great balance exercise to train all of your hip, knee, and ankle stabilizers, which will help prepare you for all those deflections your ankle has to make when you step over rocks and tree roots.
- Stand on the step with your toes at the edge
- Raise one leg out in front of the step
- Bend the knee to lower the other leg toward the floor
- Sit back as if you were going to sit in a chair
- Keep your hips level, don’t drop the other hip
- Squeeze the glute to bring you back up to standing
(3 Sets of 12 on each leg)
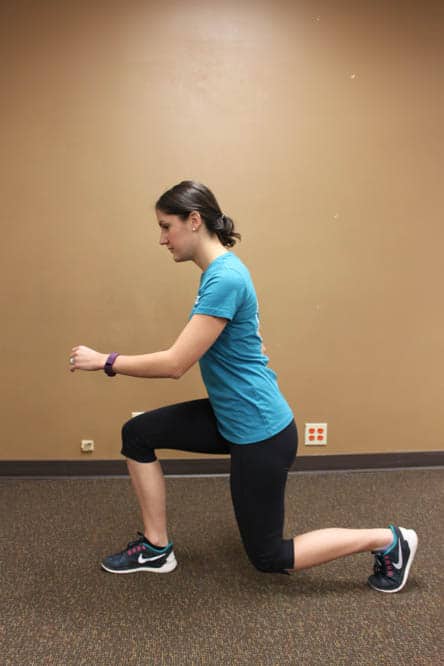
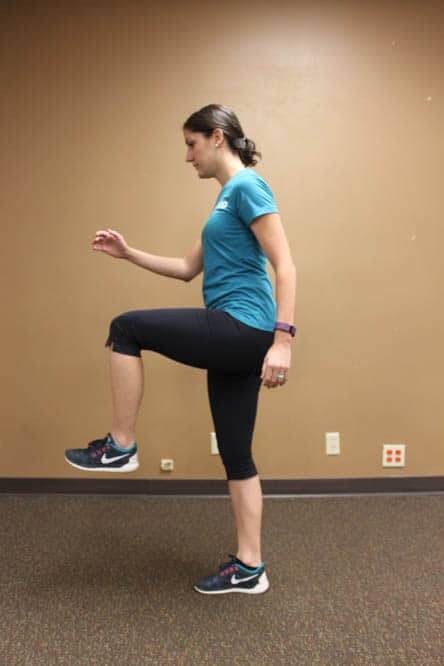
10. Backward Lunge to High Knee
This exercise is great for strengthening the glutes and quads, two of our largest anti-gravity muscle groups, which will get you to the top of that hill for the beautiful view.
- Stand with your feet together, engage the core
- Step backward on the toes with one leg
- Lower down into a lunge so that each knee is at a 90-degree angle
- Keep feet hip-width apart
- Avoid touching the back knee on the floor
- Squeeze the glutes to rise back to standing
- Lift the back leg and pass it forward until your hip and knee reach a 90-degree angle
- In a slow and controlled manner, swing the same leg backward into the lunge
(3 Sets of 12 on each leg)
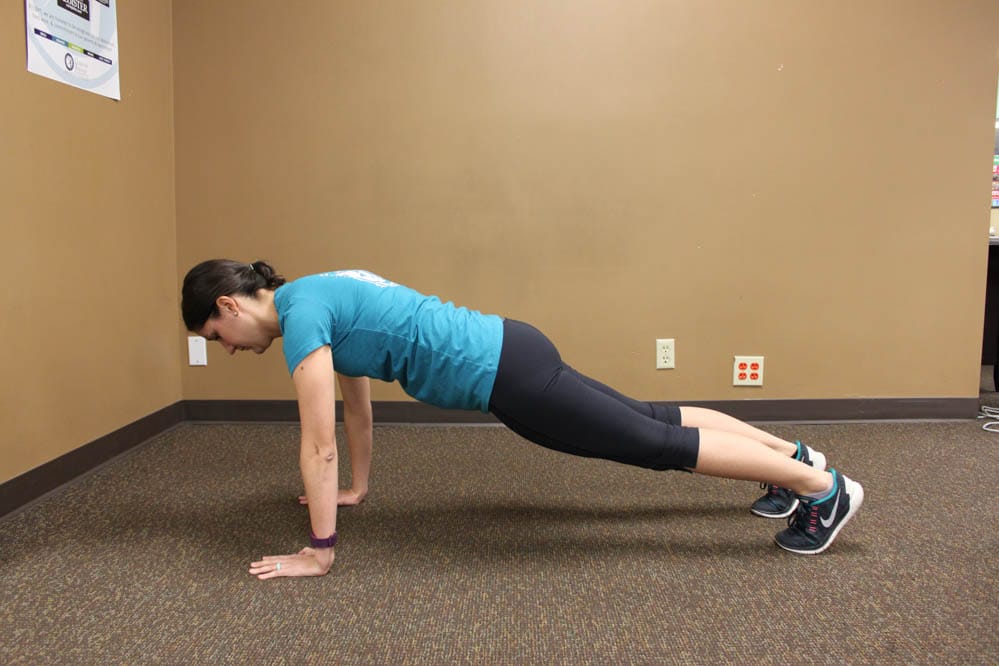
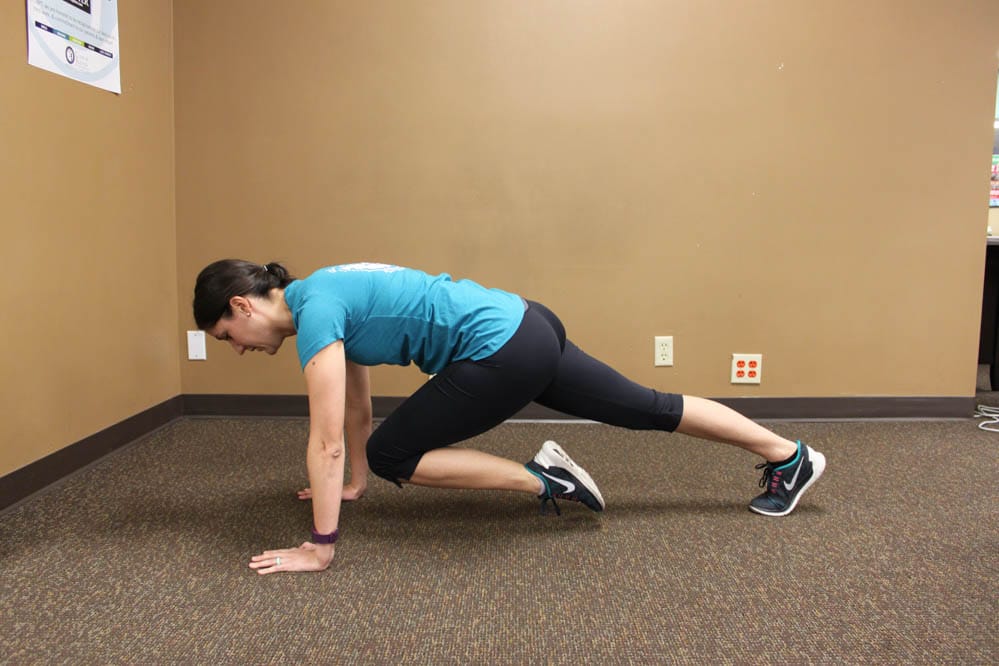
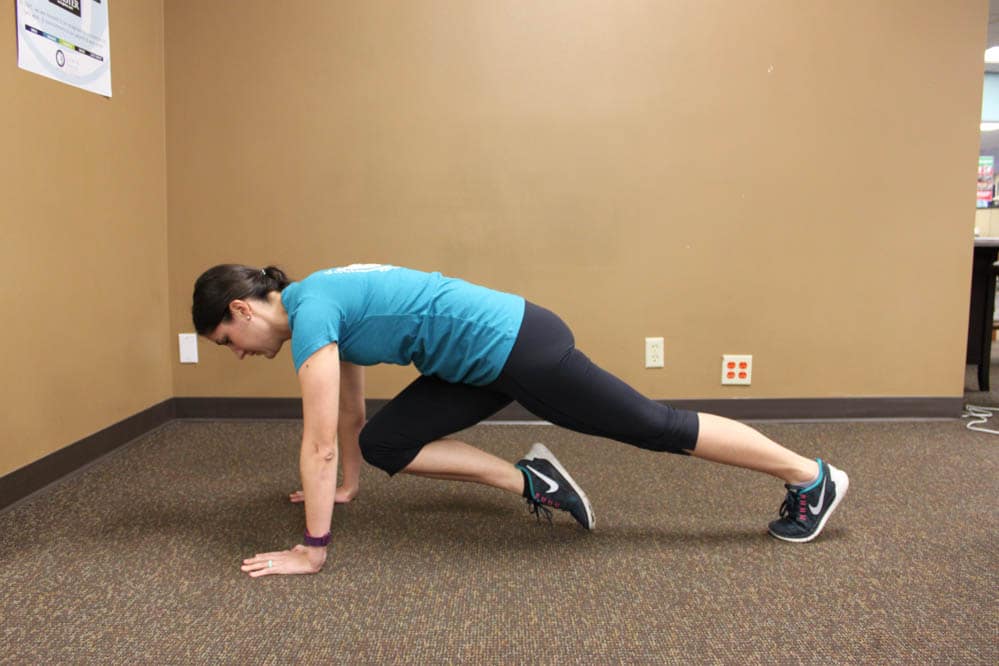
11. Mountain Climbers
This one is great for cardio and acts as a great warm-up before you get into the other exercises, and as a cool-down at the end of your workout.
Gradually work your way up to 3 minutes if you can!
- Assume a plank position with your hands on the floor under your shoulders, toes on the ground
- Keep your hips in line with your torso and legs
- Bring the knee of one leg in toward your chest
- Alternate legs as quickly as you can while maintaining your core engaged
- Don’t let your upper back sag between your shoulder blades!
(3 sets, Hold for 2 minutes)
*Perform once for warm-up and again for cool-down*
12. Other Hiking Tips You Shouldn't Ignore
- Make your training continuous. Don’t expect to have results from practicing these exercises only one week before your hike. Changes in both muscle flexibility and especially strength occur within at least 4 weeks when addressed frequently: practice the above exercises at least 3 days per week for 8+ weeks!
- Stretch! Repeat the 3 stretches from the above list after your hike, you’ll experience less soreness the next day. If you do feel sore the next day or two after your hike, try to keep moving through the pain, even a short walk is good. It will flush out the soreness faster, I promise.
- Replenish! Bring a protein or granola bar that also has a good amount of carbs in it to replenish what your body is using to fuel your hike.
- Hydrate! Bring plenty of water and drink small sips frequently throughout your hike.
- Take the stairs. You can expect some level of elevation gain on most hikes, so get some extra training in for your glutes and quads by taking the stairs. Better yet, make it into a cardio work out by going up and down the stadiums at the local high school!
Adventure is out there, and if you want to explore the great outdoors, you should make sure your body is up for the challenge so you can enjoy it!
Do you have any other hiking tips that work for you that you want to share?
Please let us know in the comments how these exercises and stretches work for you.
Sign up for a FREE Assessment with CBPT!
In her spare time, she enjoys visiting family and friends, hiking, archery, kayaking, spoiling her dogs, roller skating, listening to The Beatles, taking road trips, and traveling the world. She also enjoys watching the current award-winning TV shows and 90’s movies.
Latest posts by Taylor Rossi, PT, DPT (see all)
- Live a Healthier Lifestyle Simply by Walking! - July 10, 2017
- What are Macronutrients? An Intro to Nutrition - May 04, 2017
- Maintain Motion While Traveling With These 7 Simple Stretches - March 14, 2017
- 8 Ways To Add Fun To Your Fitness Routine - January 10, 2017
- 6 Essential Tips To Make a Quality Fitness Routine - January 05, 2017
- Hiking Exercises for the Outdoor Adventurer - December 29, 2016
- Healthy Eats: Honey Drizzled Baked Pears - December 08, 2016
- How to Avoid Injury During Thanksgiving Fun - November 22, 2016
Related Posts


Reader Interactions
Leave a comment
You must be logged in to post a comment.
SIGN UP FOR
